≫If you work on documentation, how can you work
as a piping inspector?
- Should have knowledge about project applicable standards.
- Reviewing of hydro test packages. (All documents such as Non-Destructive Examination (NDE) reports, Positive Material Identification (PMI) reports, Orifice flange reports, Joint Summary sheet shall be reviewed.
- Reviewing of calibration certificates of valves, manifold and pressure gauges.
- Reviewing of Mill test certificate.
- Analyzing the ISO drawings, checking whether the design pressure is as per the line class.
Q1. What is the difference between Hydro static pressure test & pneumatic pressure test?
- Hydro static pressure test:- A pressure test conducted using water or other approved liquid as the test medium.
- Pneumatic Test:- A pressure test conducted using air or other approved gas as the test medium or in conjunction with liquid.
Q2. What is the value of test pressure in each test?
- Hydro static pressure:- Not more than 1.5 times the design pressure.
- Manifold pressure:- At least 1.2 times the system pressure but not less than discharge pressure of pump used for pressure testing.
- Pneumatic pressure:- A set pressure not higher than the test pressure plus the lesser of 345 k Pa (50 psi) or 10% of the test pressure.
- The instrument impulse lines, whether piping or tubing, between the root isolation valve and the instrument isolation shall be pneumatically pressure tested (using air or nitrogen) at 1.25 times the design pressure of the piping system or process equipment to which it is connected.
Q3. Can you use pneumatic test in lieu of hydro static test?
- Pneumatic testing is not permitted without written approval of the company inspector, unless specifically allowed by this standard or the referenced SAES or SAMS.
- When pneumatic testing is not practical (e.g., - pressure greater than 1000 psi g, physical configuration, etc.) testing with liquid is permitted.
Q4. What are the calibration requirements for pressure gauge, min number used and its location?
- The calibration interval shall not exceed one month. Calibration certificates shall be made available to Inspection personnel prior to commencement of the pressure test. Stickers shall be applied indicating the latest calibration date.
- All gauges shall have a range such that the test pressure is within 30 to 80% of the full range.
- A minimum of two pressure gauges are required for the test system. One pressure Gauge shall be on the test pump and the other(s) on the test system. Their accuracy shall be within 5% of one another.
Q5. Where do we attain test pressure and why?
- We attain test pressure at highest pressure gauge because due to gravity, effect every 10 m height one bar pressure reduces.
Q6. What we check in water analysis and its value for CS & SS?
Q7. What are Saudi Aramco Engineering Standard (SAES)-A-004, (SAES)-A-007, and (SAES)-L-150 ?
- In water analysis we check the Ph value and chloride content of water. For CS the Ph value is 7.5 ± 5 & chloride < 250 ppm. For SS the Ph value is 10.5 ± 0.5 & chloride < 50 ppm.
- SAES-A-004 - General Requirements of Pressure Testing.
- SAES-A-007 - Hydro static testing fluids and Lay up procedure.
- SAES-L-150 - Pressure testing of plant piping & pipelines.
Q8. What are the equipment excluded from pressure test ?
- Rotating machinery, such as pumps, turbines and compressors;
- Strainers and filter elements;
- Pressure relieving devices, such as rupture disks and pressure relief valves;
- Locally mounted indicating pressure gauges, where the test pressure will exceed their scale range;
- Equipment that cannot be drained;
- Instrument Devices.
Q9. What are the types of valves?
- Based on function
A.Isolation.1. Gate valve.
2. Ball valve
3. Plug valve.
4. Piston valve.
5. Diaphragm Valve.
6. Butterfly valve.
7. Pinch valve.
B. Regulation1. Globe valve.
2. Needle valve.
3. Butterfly valve.
4. Diaphragm valve.
5. Piston valve.
6. Pinch valve.
C. Non- Return
1. Check valve.
D. Special purpose
1. Multi-Port valve.
2. Flush Bottom valve.
3. Float valve.
4. Foot valve.
5. Line blind valve.
6. Knife Gate valve.
A. Self- operated valves:- Mainly Check Valve are Self-Operated Valve
- Method of operation
B. Operated valves:- All other valves are type comes under the Operated valve.
A. Screwed ends.
- Based on end connection (arrangement of attachment of the valve with the equipment or the piping.)
B. Socket ends.
C. Flange ends.
D. Butt weld ends.
E. Wafer type ends.
F. Buttress ends.
♊Types of Valve and it's Function:-
A. Diaphragm Valve:- These forms of Diaphragm Valve are popular for regulating the flow of Slurries, Corrosive fluids and Vacuum.

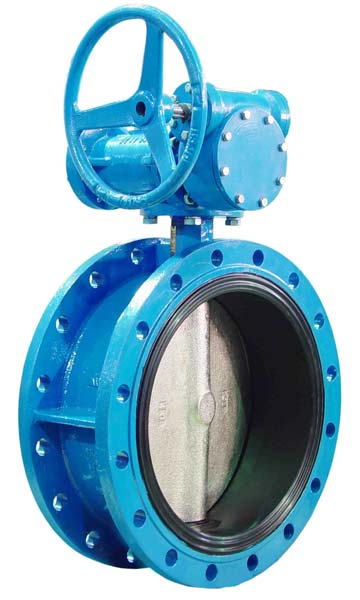
B. Butterfly Valve:- Used for liquid, Slurries, Powders and Vacuum. The usual resilient plastic Seat has temperature limitation but tight closure at high temperature (i Double Flange type, wafer lug type and wafer type valve).

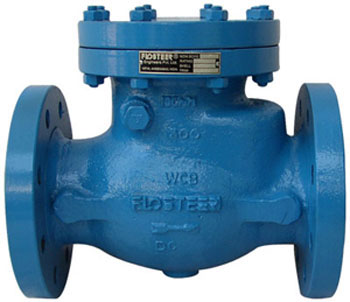
C. Check Valve:- Designed to permit flow of liquid or gas in a one direction and close if flow reverse (i.e. Lift check valve and swing check valve).
.jpg)
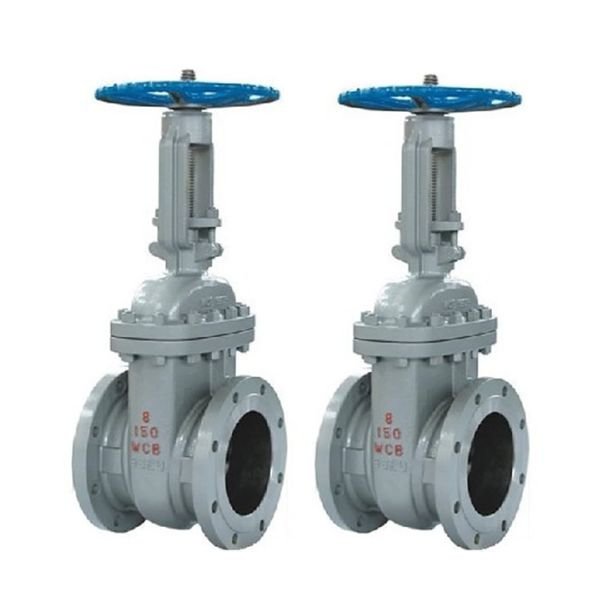
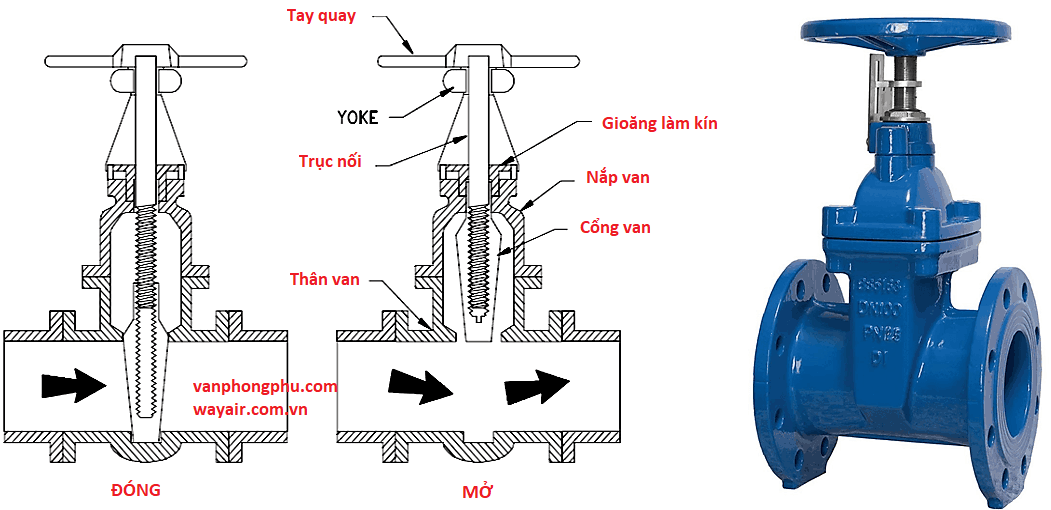
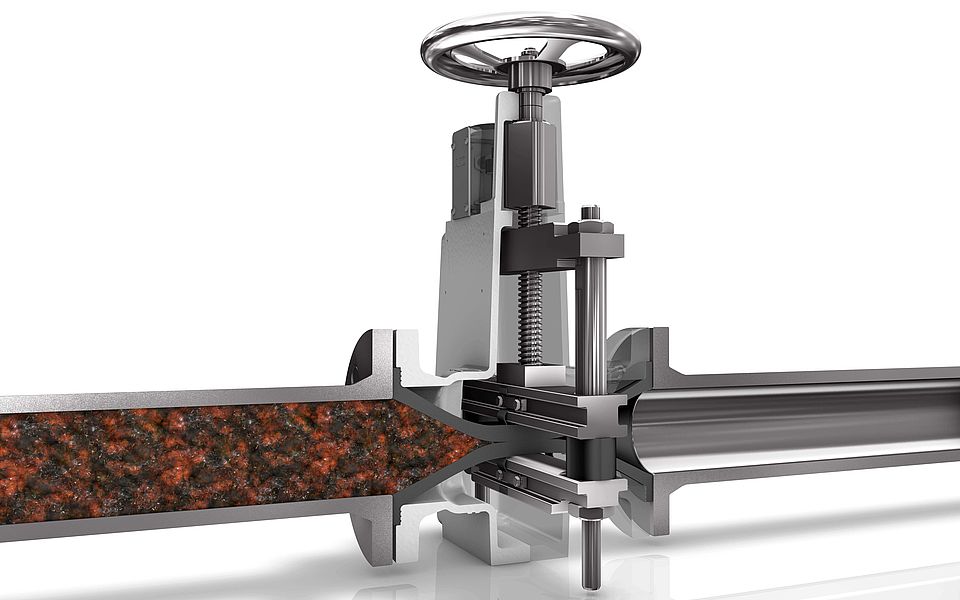
D. Gate Valve:- Use for Water, Gas, Steam and Slurries line suitable for throttling and full flow use.

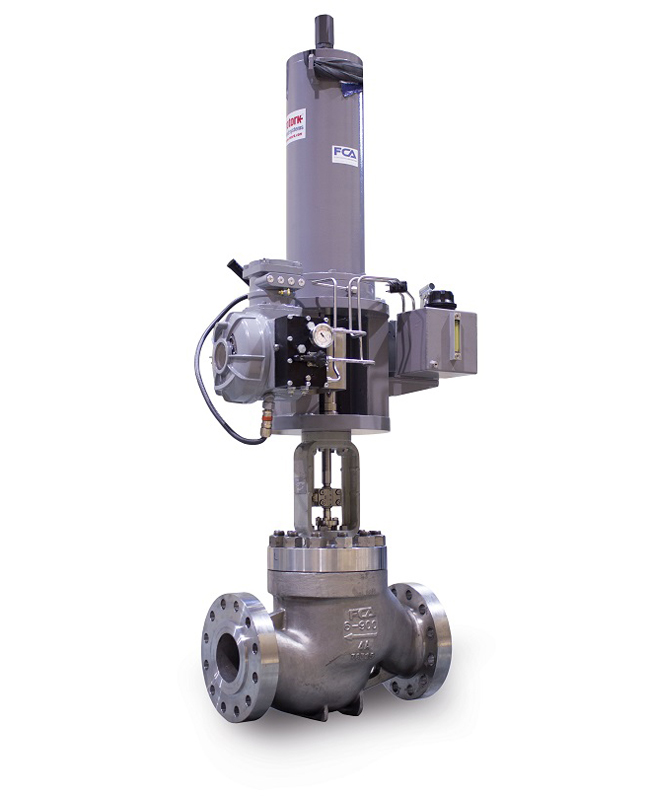
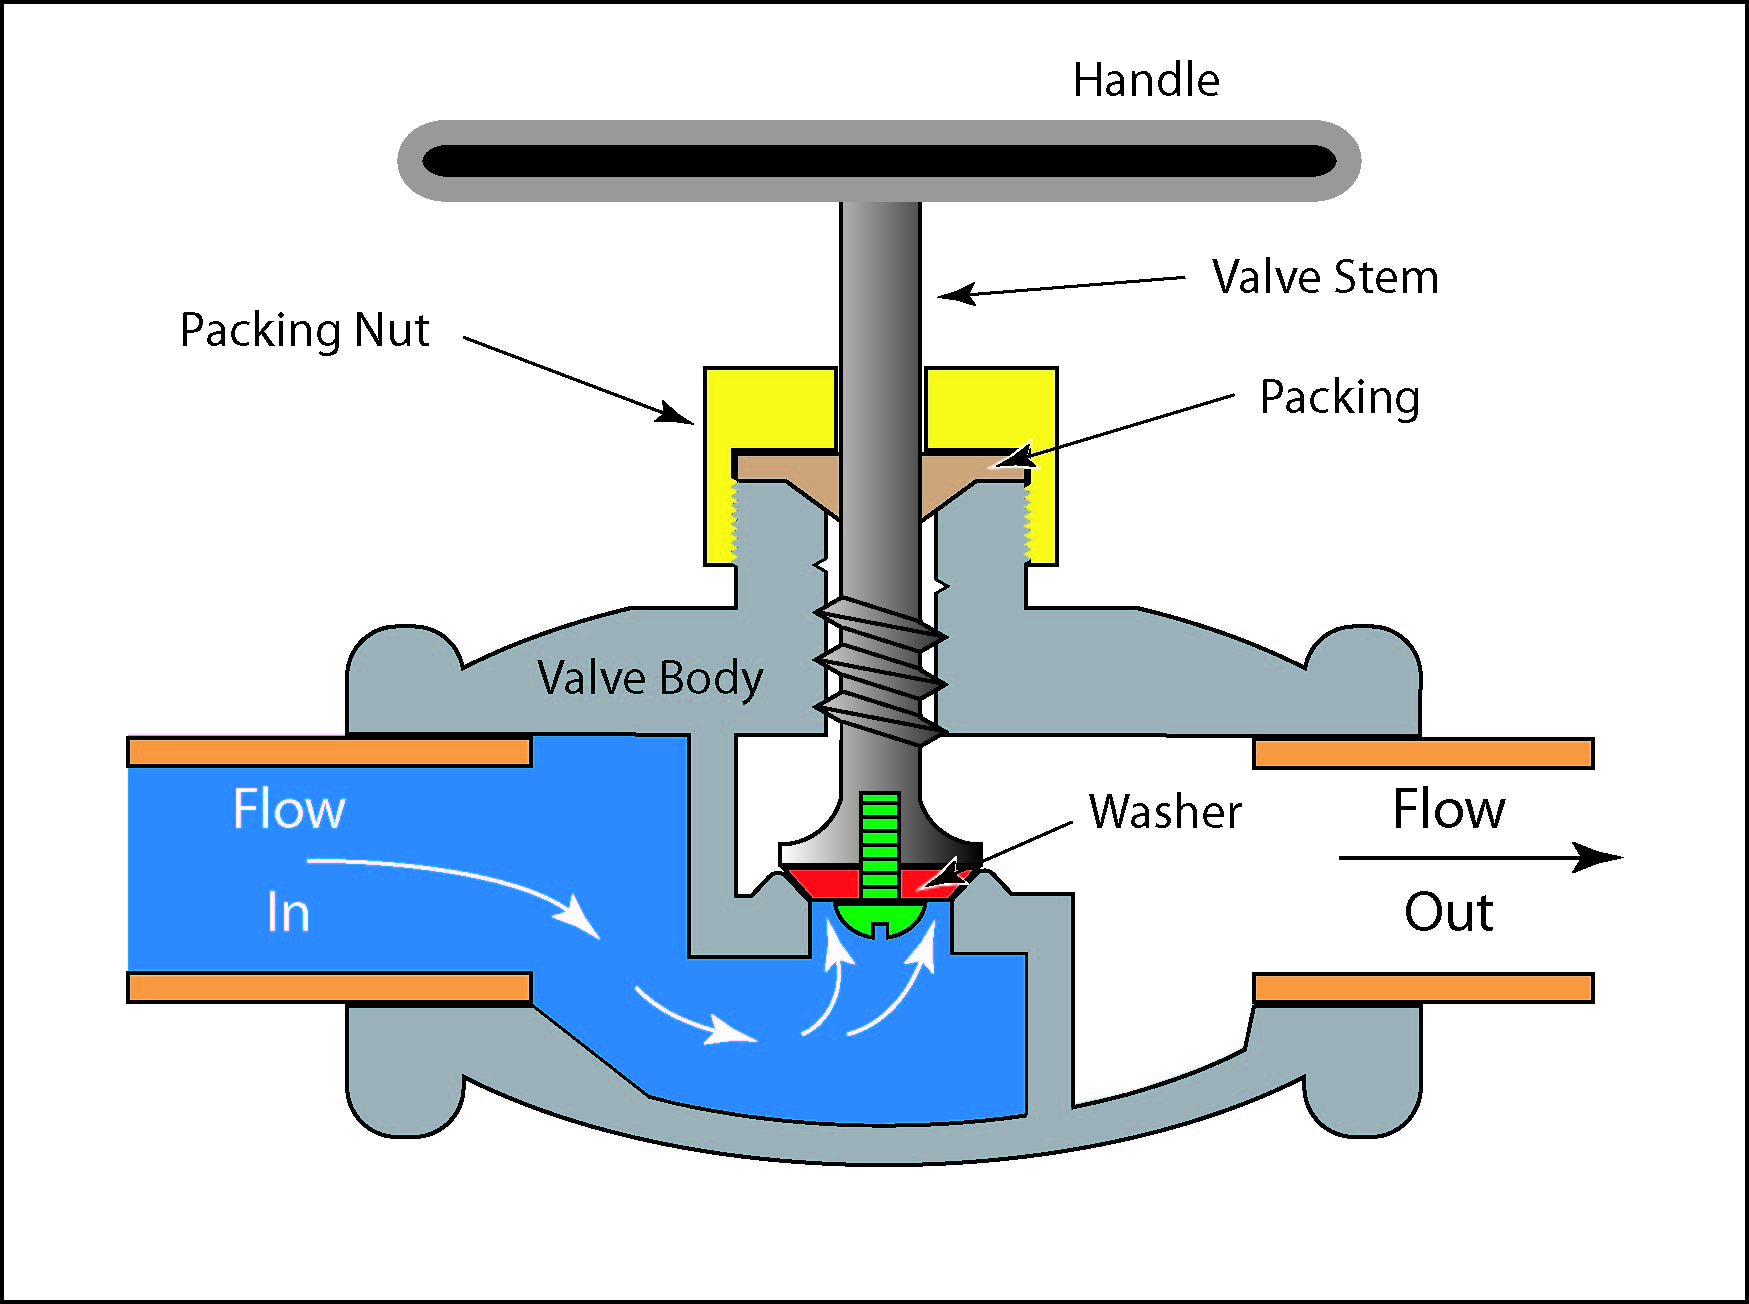
E. Globe Valve:- Use fr regulating flow should be from seat stem side, assist closure and to Prevent the disc chattering against the seat in the throttling position.


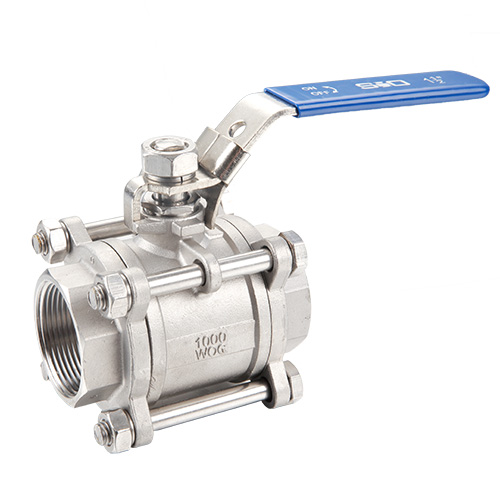
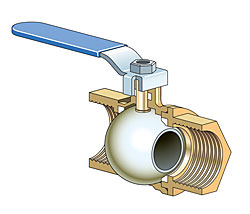
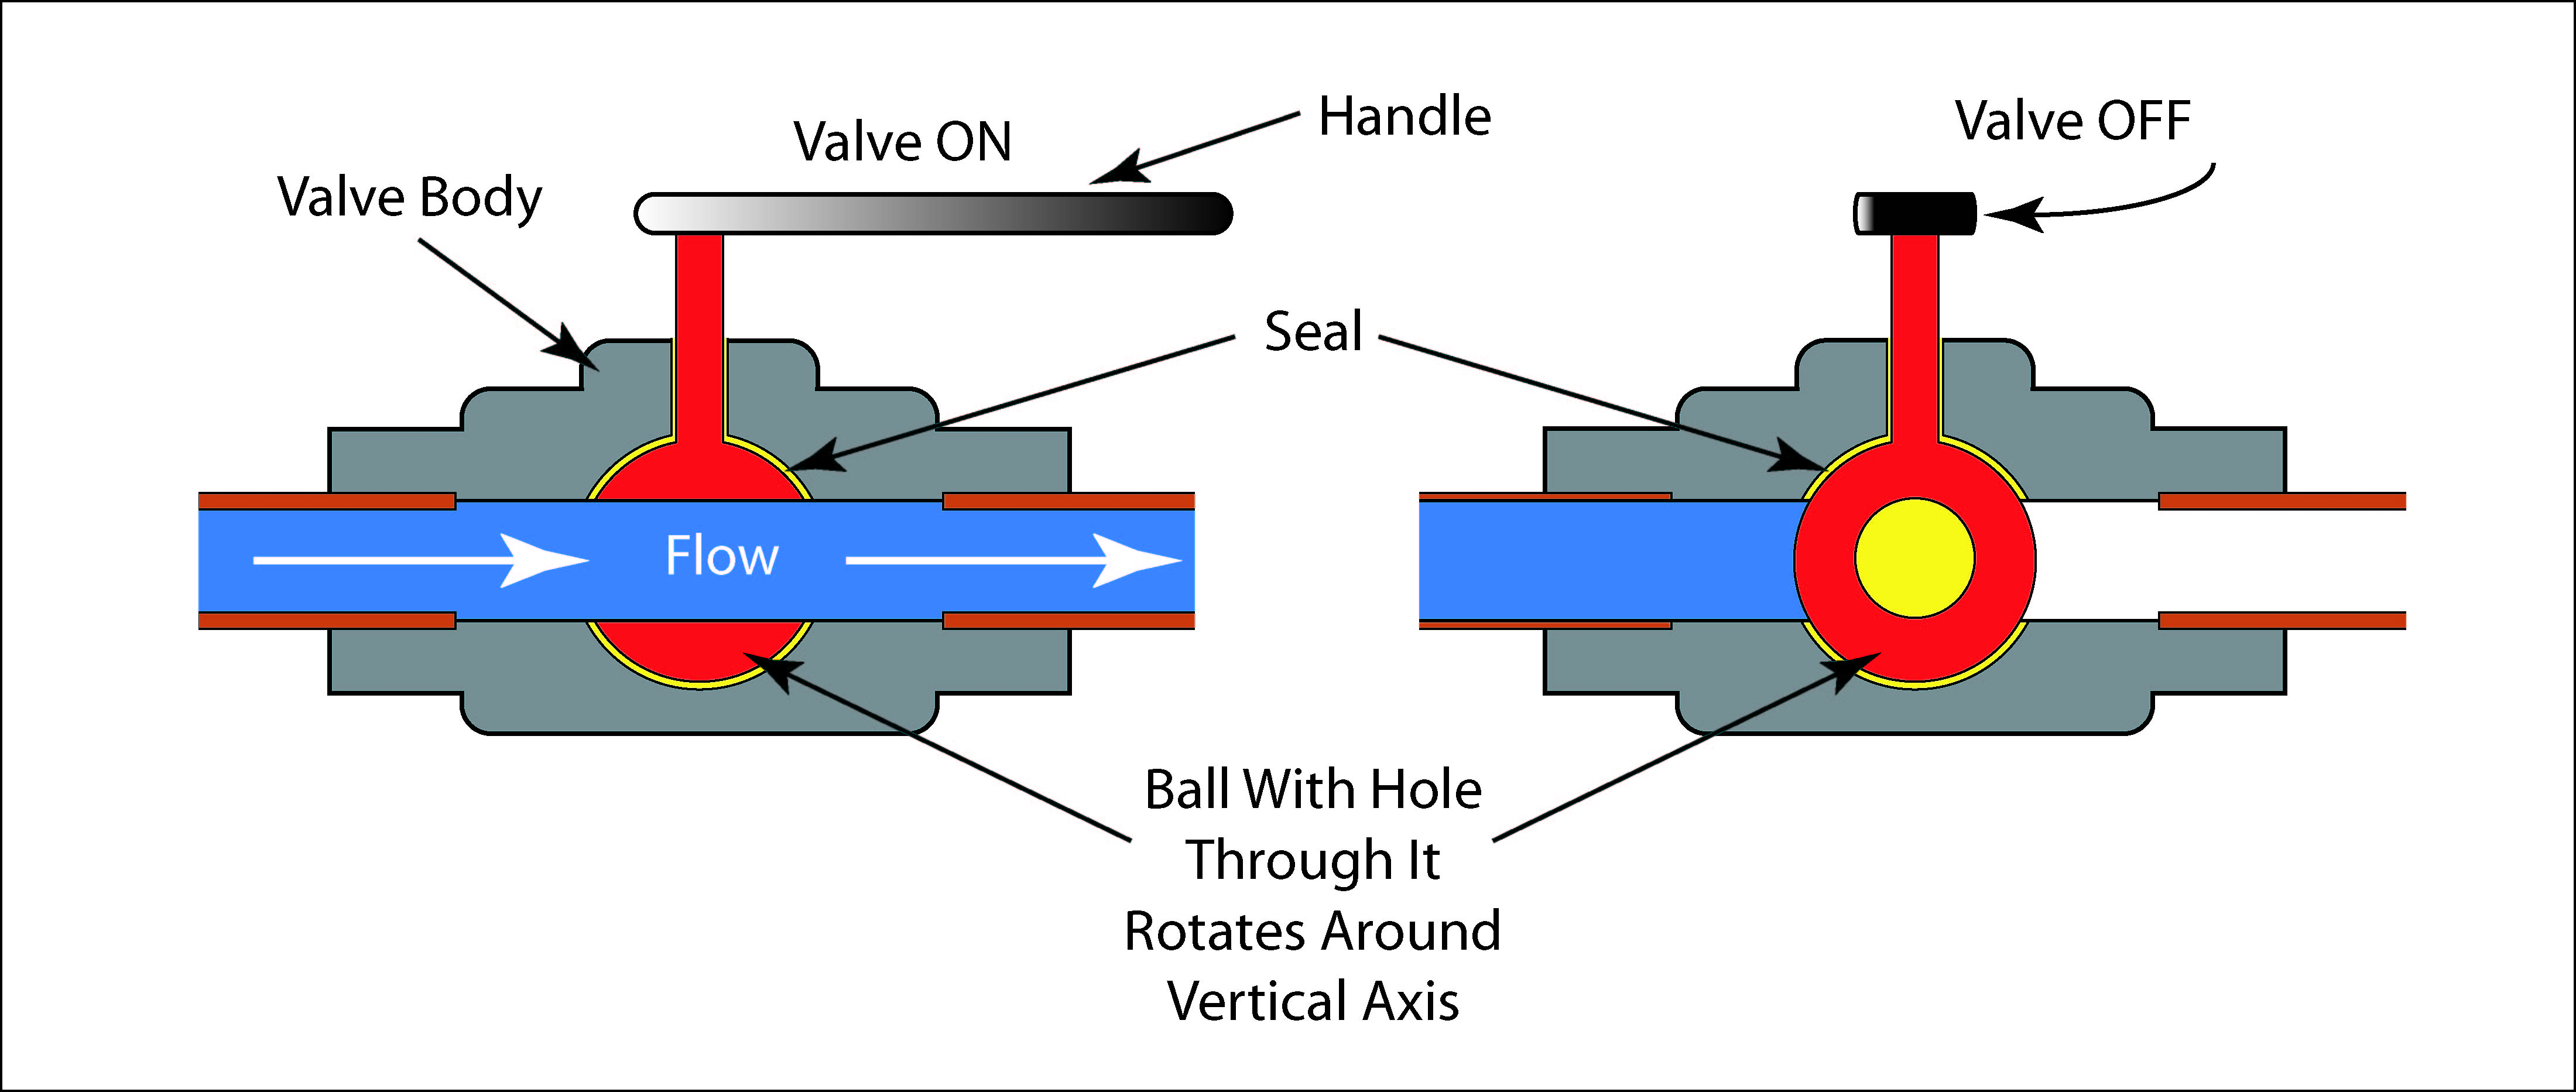
F. Ball Valve:- A ball valve is a valve with a spherical disc, the part of which controls the flow through it.

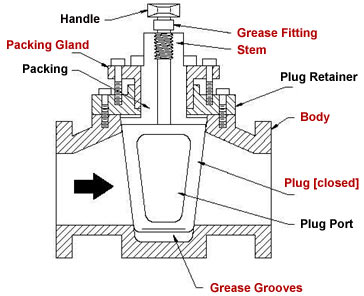
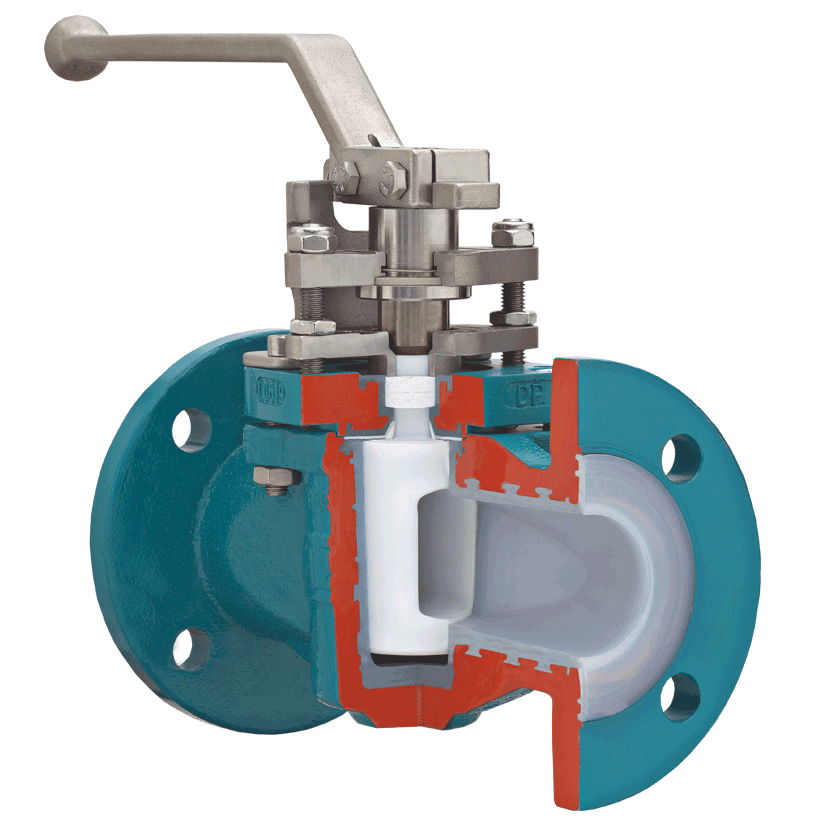
G. Plug Valve:- Plug valves are valves with cylindrical or conically tapered "plugs" which can be rotated inside the valve body to control flow through the valve. It can be used in different types of fluid services such as Air, gaseous, vapor, Hydrocarbon, slurries, mud, and sewage applications. Plug valve can be used in a vacuum to high-pressure & temperature applications.
H. Piston Valve:- A piston valve is a device used to control the motion of a fluid along a tube or pipe through the linear motion of a piston within a chamber or cylinder. Examples of piston valves are: The valves used in many brass instruments. The valves used in pneumatic cannons.
I. Pinch Valve:- A pinch valve is a full bore or fully ported type of control valve which uses a pinching effect to obstruct fluid flow.

J. Needle Valve:- A needle valve is a type of valve with a small port and a threaded, needle-shaped plunger. It allows precise regulation of flow, although it is generally only capable of relatively low flow rates.

Q10. Where we use temporary gaskets?
- Used as a test limit during hydro test.
Q11. What are the types of gasket?
- Based on construction
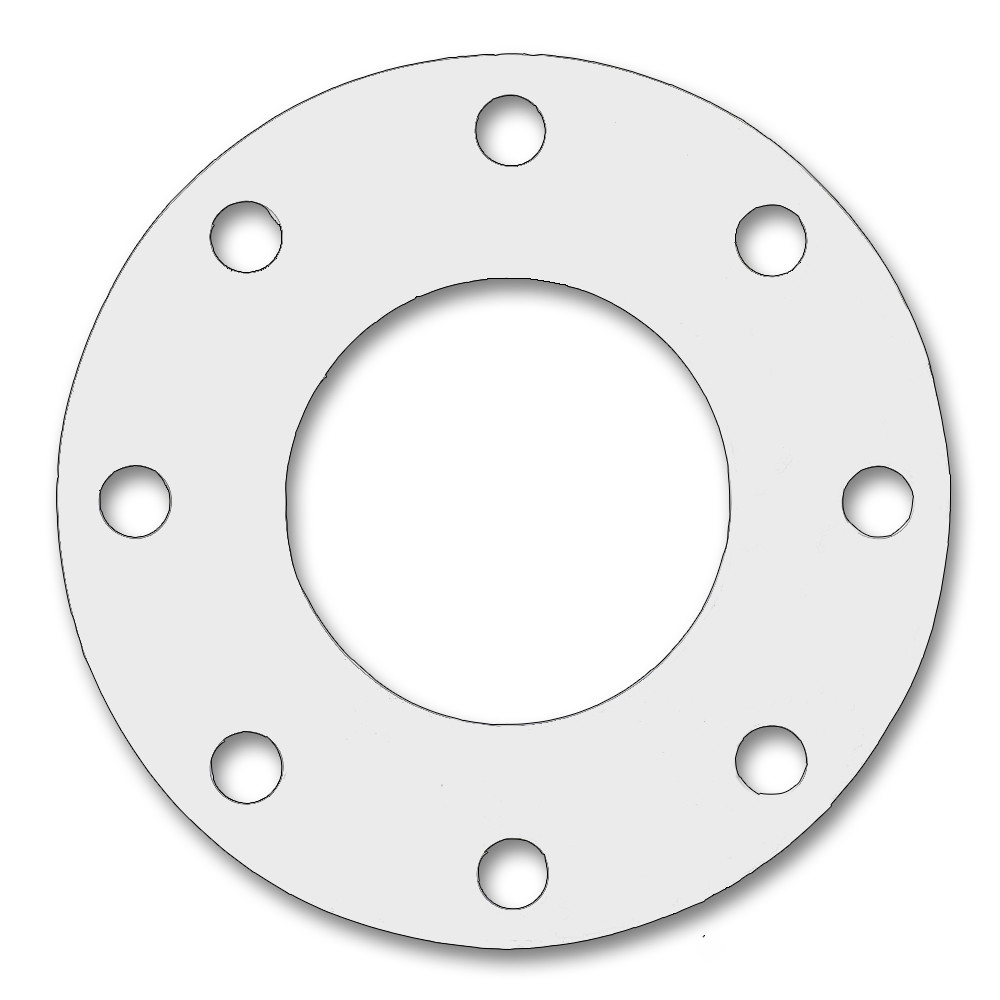
A. Full face:- A full face gasket covers the entire flange face and includes bolt holes, typically used in flat faced flanges. A gasket for a raised face flange is typically a RING gasket.
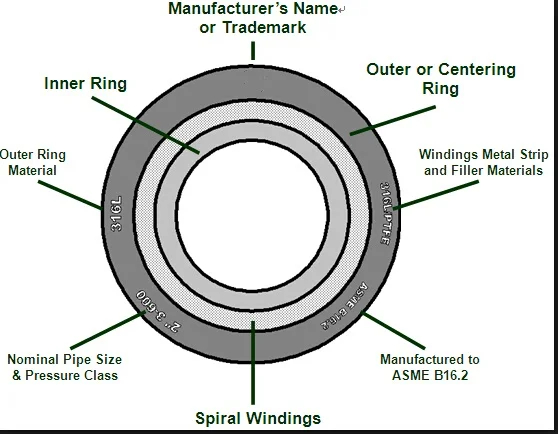
B. Spiral Wound Metallic Gasket:- The spiral wound metallic gasket is semi-metallic, comprising of a spirally wound v shaped stainless steel strip and a non-metallic filler material, such as graphite or PTFE (Poly-tetra-fluoro-ethylene). Also on the gasket, is a solid outer ring used for centering and controlling compression.

C. Ring type.
D. Metal jacketed.
E. Inside bolt circle.
- Based on material
A. Synthetic rubber
B. Solid Teflon
C. Compressed Asbestos
D. CS (High pressure fluid)
E. SS (High fluid corrosive)
F. Spiral Wound
B. Solid Teflon
C. Compressed Asbestos
D. CS (High pressure fluid)
E. SS (High fluid corrosive)
F. Spiral Wound
a) Teflon
b) CS & SS
Q12. Why and how color coding gaskets are done?
- Color coding of gaskets are done based on material specification and the suitable flange rating. It helps to check correct gaskets are used on flanges, also helps to store and handle gaskets easily.
Q13. What is a test limit?
- Test limit is the boundary up to which the pressure testing is conducted.
Q14. What are the types of flanges?
- Based on pipe attachment:-
1. Slip – on:- The Slip-on type flanges are attached by welding inside as well as outside. These flanges are of forged construction.

2. Socket Weld:- The Socket Weld flanges are welded on one side only. These are used for small bore lines only.

3. Screwed (Threaded):- The Screwed-on flanges are used on pipe lines where welding cannot be carried out.

4. Lap Joint:- The Lap Joint flanges are used with stub ends. The stub ends are welded with pipes & flanges are kept loose over the same.

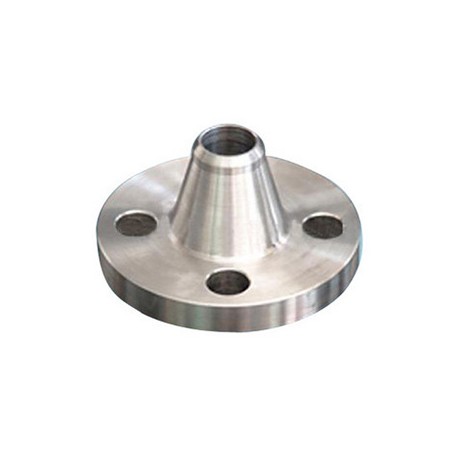
5. Welding Neck:- The Welding neck flanges are attached by butt welding to the pipe. These are used mainly for critical services where the weld joints need radio graphic inspection.

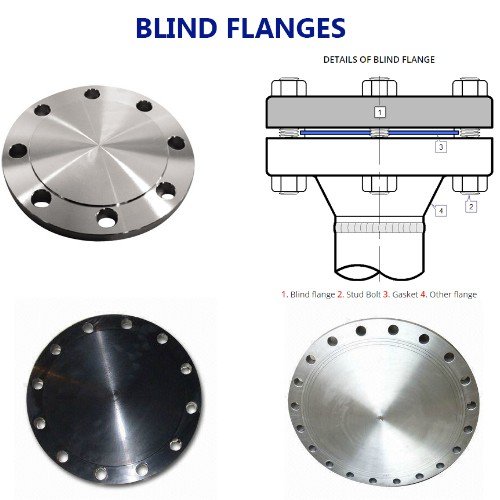
6. Blind:- The Blind flanges are used to close the ends which need to be reopened.
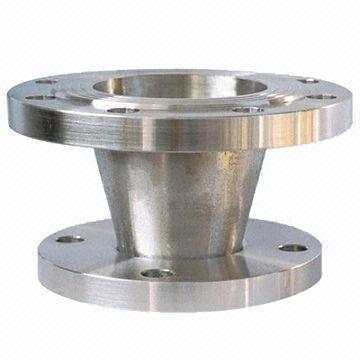
7. Reducing:- The reducing flanges are used to connect between larger and smaller sizes without using a reducer. In case of reducing flanges, the thickness of flange should be that of the higher diameter.
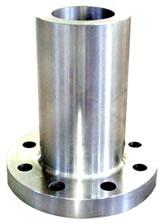
8. Integral:- Integral flanges are those, which are cast along with the piping component or equipment.
- Flanges are classified based on pressure temperature ratings as:-
A. 150 B. 300 C. 400 D. 600 E. 900 F. 1500 G. 2500
- Flanges are classified based on facing as:-
A. Flat face. (FF)
B. Raised face. (R/F)
C. Tongue and groove. (T/G)
D. Male and female. (M/F)
E. Ring type joint. (RTJ)
- Based on face finish as:-
A. Smooth finish. B. Serrated finish.
Q15. What do you mean by socket flange? Draw and explain?
Ans. Pipe inserted in to the socket of the flange and welded one side only is known to be socket welding flange.


Q16. What is the axial gap to given for socket welding?
Ans. 1.5 mm to 3 mm maximum.
 |
| Socket Welding |
Q17. SAES standard for flange?
- SAES-L-109 Selection for pipe flanges, stud bolts and gaskets.
- SAES-L-351 Bolted Flange Assembly.
Q18. How to give a gap in socket flange?
Ans. Place gap-o-let ring at the inside of socket, gap range is 1.5 to 3 mm. if gap-o- let ring is not available measure the socket length, mark it on the pipe and give 1.5 to 3 mm gap during socket welding.
Q19. General requirements to be done after hydro test?
- Ans. Draining of Test Fluid:- Release of pressure and draining shall be done on the downstream side of check valves. All vents shall be opened before draining to facilitate drainage and to prevent formation of a vacuum. No test fluid shall remain in low spots.
- Disposal of Test Fluid:- The test fluid shall be disposed in accordance with SAEP-327 (Disposal of Wastewater from Cleaning, Flushing and Dewatering Pipelines and Vessels) or as directed by the Owner.
- Test Vents and Drains:- Vents and drains used only for the pressure test shall be plugged, seal welded and penetrate tested.
- Removal and Re-connection of Components:- All temporary items installed for testing purposes (e.g., manifolds, valves, blinds, spacers, supports) shall be removed. Items that were removed from testing shall be reinstalled. Items, such as instrument air tubing, check valve discs which were disconnected before testing shall be reconnected. Isolation valves closed for the test purposes and that are required to be in the open position for process reasons shall be opened. If the valve cavity has a drain, the cavity shall be drained.
Q20. What punch to be closed after hydro test?
- B- punches to be closed after hydro test.
- Temporary items shall be removed, bolt torquing, all instruments shall be installed, and items removed for testing shall be reinstalled.
Q21. What are different types of support used?
Ans. SUPPORT:- Pipe support hold the pipe in position and prevent excessive deflection due to the weight of the pipe, fluid, external insulation and other loads.
- HANGER SUPPORT:- Device which suspends piping (Usually a single line) from structural steel, concrete or wood. Hangers are adjustable for height.
- SHOE SUPPORT:- A metal piece attached to the underside of a pipe which rests on supporting steel. Primary used to wear from sliding for lines subject to movement. Permits insulation to be applied to pipe.
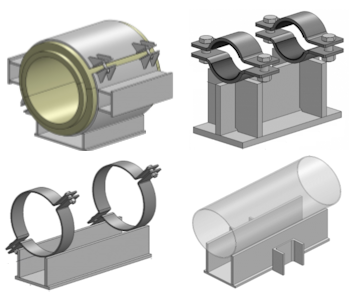

- ANCHOR SUPPORT:- Pipe anchors restrain axial movement and applied forces. These forces may result from thermal expansion, water hammer, vibrating equipment, or externally applied mechanical loads.
- GUIDE SUPPORT:- Pipe guide prevent horizontal (side to side) movement of the pipe. Using with ‘C’ channels.
- SADDLE SUPPORT:- A welded attachment for pipe requiring insulation and subjected to longitudinal or rolling movement (Resulting from temperature changes other than climatic).
- DUMMY LEG SUPPORT:- An extension piece of (pipe or rolled steel section) welded to an elbow in order to support the line.


Q22. What are the instruments to be calibrated before bolt tightening?
Ans. Torque Wrench.
Q23. What are the general criteria checked for line-checking?
- All joints (flange, threaded, welded or mechanical seals) are left exposed for visual leak detection during the strength test.
- All permanent flange joints were inspected, gasket mat'l verified & properly torqued.
- Drains shall be provided at all low points of the piping system.
- Vents and drain valves, both temporary and permanent, conforms with the piping class or rating.
- Supports are installed. Additional temporary support may be installed as required.
- Expansion joints and spring hangers or spring supports are provided with temporary restraints.
- Arc strikes, gouges, and other indications of careless workmanship (such as surface porosity, uneven weld profiles, and undercut) shall be removed by grinding and inspected by magnetic particle or liquid penetrate method.
- Drains are provided immediately above check valves (vertical lines)
- All threaded joints up to the first block valve of hydrocarbon pipeline are seal welded. Thread engagement has been verified & accepted.
- The pressure testing manifold is separately pressure tested to at least 1.2 times the system test pressure but not less than the discharge pressure of the pump used for the pressure testing.
- Pressure gauges and pressure recorders are calibrated within one (1) month before the test. Check stickers at the time of the test.
- Line compliance with Isometrics:
A) Correct Materials utilized grade/schedule (Bill of Mat'ls).C) Construction tolerances per SAES-L-350 (Construction of plant piping).
B) Correct flange and fittings rating.
Ans.Wet H2S Service definition for refining.( HIC Resistant carbon steel) All refinery service environments containing free water (liquid), to the following service conditions:
- >50 ppm w dissolved H2S in the free water or,
- Free water pH < 4 and some dissolved H2S present or,
- Free water pH > 7.6 and 20 ppm w dissolved hydrogen cyanide (HCN) in the water and some dissolved H2S, or
- 0.05 psi or greater partial pressure H2S in the gas with a gas phase.
- Wet H2S service is not considered if no free water is likely to be present.
- Wet H2S service is considered if free water is present or susceptible to be present.
The severity of the service too SCC, HIC and SOHIC is estimated from the following table according to pH, water H2S content, and HCN content (FCC and cocker unit).
- Water saturated gas containing H2S or liquid saturated in water and HS2 have to be considered.
- Short exposure to wet H2S service due transient operation have to be
- Integrated and usually considered as moderate service.
- Wet H2S Service Classification
The following Table-A provides the basic rules for classification of wet H2S services. However, classification should be confirmed by a Company Representative to integrate feedback and operation variation.
Table A: Wet H2S Service ClassificationY= H2S (ppm)
(1)
X = pH Y ≤ 50 50 < Y ≤ 2000 Y > 2000
X ≤ 4 Moderate Severe Severe
4 < X ≤ 5 Low (none) Severe Severe
5 < X ≤ 7.8 Low (none) Moderate (2) Moderate (2)
X > 7.8 Low (none) (2) Moderate (2) Severe
Notes to Table A:
1) H2S in the water phase. 2) Severe if HCN > 20 ppm.
- Process water at ambient temperature containing less than 2 % NH4HS with pressure lower than 4 bars should be considered as moderate wet H2S service if HCN content is less than 20 ppm.
Q25. NACE (National Association of Corrosion Engineers)– MR- 0175?
Ans. Sulphide stress cracking resistant metallic material for oil field equipment.
Q26. What are the types of CS & SS pipes?
- Carbon Steel:- ASTM A53 Gr. A/B, ASTM A106 Gr. A/B/C, ASTM A333 Gr.1/Gr.6
- Stainless Steel:- ASTM A312 TP304/ TP304L/ TP304H/ TP308/ TP310/ TP316/ TP316L/ TP316H/ TP317/ TP321/ TP321H/ TP347/ TP347H/ TP348/ TP348H.
Note:- ASTM - American Society for Testing & Materials.
Q27. What are the different types of 304 & 308?
- 304 – Cr- 18-20%, Ni- 8-10%.
- 308 – Cr- 20% , Ni-10%.
Q28. What is a piping line class? Explain?
Ans. Total number of characters below in this line class is:
First
|
Second
|
Third
|
Fourth
|
Fifth
|
|
Representation
|
Flange face and rating
|
Basic material
|
Corrosion allowance
|
Main service type
|
Used for specific cases
|
Eg:
|
103
|
CH
|
2
|
S
|
M
|
Explanation
|
Flange face rating
|
HIC carbon resistant steel
|
3 mm corrosion allowance
|
Wet H2S sour service
|
Category M service
|
Q29. What is tack weld?
Ans. Tack weld is the temporary weld to maintain joint alignment. All tack welds shall be made by qualified welders. Recommended tack thickness is 3.2 – 4.8 mm & length is 12.5 - 25.4 mm. the minimum number of tack welds for 3.5 inch and below are 3 equally spaced tacks. Above 3.5 inch 4 equally spaced tacks.
Q30. What are the different types of fluids in ASME, Explain?
- Category D fluid Service – Non-flammable, non toxic and non damaging to human tissues.( temp range -29 ˚C to 186˚ C).
- Category M fluid service- Toxic and flammable.
- High pressure fluid service – Based on class 2500 rating for specified design temp. and material group.
- Normal fluid service – Not subjected to D, M or High pressure fluid service.
Q31. For the verification/traceability of materials what are the different procedures to be used?
- PMI– Positive Material Inspection ( SAES-A-0206 )
- Marking& Colour Coding ( PFI-ES-11, PFI-ES-22- Piping Fabrication institute)
- Spools are stamped, stenciled, or clearly marked with a permanent marking method, properly colour-coded and uniquely identified, labelled & traceable to Isometric Drawings. (SAES-L-350).
Q32. What are the difference b/w a pipe and a tube?
Ans. Pipe is identified by NPS (nominal pipe size) and thickness is defined by Schedule whereas Tube is identified by OD & thickness identified by Birmingham Wire gauge.
Q33. What are the documents in hydro test package?
Ans. a) Table of contents
b) Safety Instruction sheet for critical services
c) Flow Chart of Test Packages
d) Pre-Test Punch List
- Test Procedure & Pressure Test Diagram
- Related P&ID and Isometric Drawings
- Line List
- Pre-test Punch List Checklist I Form
e) QA/QC Documentation of the system to be tested.
- Weld Inspection Summary Sheet.
- Weld Map.
- NDE (Non-destructive Examination) Record/s.
- As-Built drawings.
- Isolation valve Test Certificates.
- Flange Joint Inspection Report.
- Internal Cleanliness I Flushing Report.
f) Pressure Testing.
- Verification of Temporary gaskets.
- Verification of Test blind rating.
- Checklist for Verification of system readiness for Testing.
- Calibration certificates for Pressure gauge & PSV.
- Calibration certificates for Pressure & Temperature recorders.
- Test manifold Certificate.
- Water Analysis (test medium).
- Pressure Test Report Form.
- System Lay-Up Certificate.
- Reinstatement or Final Assembly Inspection (Final Punch List).
Q34. What are the general requirements for pressure gauges?
- A minimum of two pressure gauges are required for test systems, with accuracy within 5% of one another.
- Pressure gauges and pressure recorders are calibrated within (1) month prior to test. Stickers applied indicate latest calibration date.
- Test gauge is located at bottom of any equipment/system under test to enable reading test pressures inclusive of hydro static head.
- All gauges have a range such that the test pressure is within 30% to 80% of the full range.
Q35. Why water certificate is necessary for hydro test?
Ans. To know the chloride content and PH value, Water certificate is necessary.
Q36. What are the difference between A-punch & B-punch?
Ans. List of unfinished work or unmatched item according to DRWG and specifications before Hydro test.
A - To be done before Hydro testB - To be done before Mechanical completionQ37. Why do we provide Drip Leg in Steam Line?
Ans.To remove condensate when there is a rise of same in the pipe along the flow direction. If drip leg is not provided in steam line, the condensate which forms inside the pipe will result in Water Hammer effect causing damage to piping system.
Q38. What do you mean by Jacketed Piping?
Ans. Piping which is recognized as providing the most uniform application of heat to the process, as well as maintaining the most uniform processing temperatures where steam tracing is not capable of maintaining the temperature of fluid constant. Usually used for molten sulfur, Polymers service.
Q39. If we are using valve as a test limit, what are the things to be checked?
Ans. The valve certificate of seat test to be attached.
Q40. What is a P&ID?
Ans. Piping & instrument Diagram shows piping layouts and detailed notes relating to piping and instrumentation.
Q41. Why we are using check valves?
Ans. All valve in this category are designed to permit flow of liquid or gas in one direction and close and if flow reverse.
Q42. What is shot pining?
Ans. Inducing chemical stress in a material surface layer by bombarding it with a selected medium under controlled conditions.
Q43. What is cold spring?
Ans. Application of mechanical stress (bending twisting pulling) upon a piping segment to achieve bolting and connection to another segment. It is not acceptable.
Q44. What is an Inspection & Test Plan? What is a SATIP?
Ans. It is a mandatory item in the Quality Plan to guide and assure quality in a specific type of work in a specific sequence of QC activity steps. A SATIP is a Saudi Aramco Inspection & Test Plan indexed by ARAMCO standards.
Q45. What is an isometric drawing?
Ans. A detailed piping system/line drawing with reference to construction and material requirements.
Q46. What is often overlooked during orifice flange fabrication?
Ans. Grinding butt welds flush and seal welding orifice.
Q47. What NDT methods are required during orifice flange installations?
Ans. Visual and PT/MT.
Q48. What are the criteria for cold bending?
- Cold bends are made below 649°C, (below 315°C for grades of pipe strengthened by cold work).
- Only seamless Grade B pipes are to be used.
- For wet sour service, cold bends to a radius of 5D or less, are heat treated at 593°C to 649°C for one hour per 25.4 mm of nominal wall thickness, and not less than one hour.
- For cold bends with a radius of less than 30D, the nominal diameter (O.D.) divided by the nominal wall thickness does not exceed 35.0.
- For wet sour service, each bend has a hardness measurement made at the outer radius of the bend area. Maximum allowable hardness is 237 Brinell (22 HRC).
Q49. What are the criteria for hot bending?
- Furnace hot bends are only be used for Grade B pipe
- Furnace hot bends are made at 871°C to 954°C, but may be finished below 871°C provided the bend is started above 871°C. The pipe is not heated above 954°C prior to the start of bending. After bending, the bend is cooled in still air.
Q50. How do we identify Nace Carbon Steel and Normal Carbon Steel?
Ans. By color coding
Q51. How do we preserve pipes and pipe fittings?
- Pipe shall not be stored directly on the ground. Pipe shall be placed on wooden or sleepers.
- Stacking of pipes shall be made in a manner to avoid damage to pipes or coatings.
- Fittings and valves shall be stored in shipping crates or on racks. Stainless pipe and fitting must be separate from carbon steel to avoid contamination.
- End bevel protectors shall remain on pipes and fittings while in storage, protectors shall not damage internal or external coating.
- Flange face and threads shall be protected from rust by applying suitable rust preventives.
Q52. How to cut a SS pipe and what are the things to be ensured before cutting?
- Stainless steel pipes - By grinding or Plasma cutting providing internal protection from spatter, slag…etc.
- Before cutting the pipe, the Heat Number will be transferred to the cut pieces by low stress dye stamping, Paint marking or Tagging.
Q53. What are the tolerances to be followed in piping?
- The tolerance for axial dimensions, face-to-face, center-to-face and location of attachments shall be ±3 mm maximum.
- Flattening of bends, measured as the difference between the largest and the smallest outside diameter at any cross section, shall not exceed 5% of the nominal diameter of the pipe. Flattening of bends at weld ends shall not exceed 3% of the nominal pipe diameter.
- Lateral transition of branches and connections from the center line of the run shall not exceed ±1.5 mm.
- Flange bolt holes shall straddle the established center lines. Rotation of flanges, measured as the offset between elevations of bolt holes on opposite sides of a flange center line, shall not exceed ±2.4 mm.
- The tilt of a flange measured at the periphery across any diameter shall not exceed 1.6 mm from the square position.
- For piping over 3-inch NPS connected to machinery/equipment, flange alignment shall be within the following limits,
a) Vertical bolt hole offset: ±2.4 mm
b) Horizontal bolt hole offset: ±2.4 mm
c) Rotational offset: ±2.4 mm
d) Flange face tilt across diameter: 0.001 inch per inch of flange outside diameter up to a maximum of 0.030 inch, and 0.010 inch for all flanges with an outside diameter less than 10 inches.
e) Flange face separation, gasket thickness: ±1.6 mm
f) Combination of vertical, horizontal and rotational offset: ±3.2 mm
- If a spectacle plate is installed between two flanges, these tolerances can be increased by 30% except for tolerances for flange face tilt across diameter and flange face separation.
- A wrinkle (buckle, dent, cracks and mechanical damage) is caused for rejection and is defined as deviation of the pipe wall from the ideal contour of more than 15% of the normal surface perpendicular to the surface.
- Dimension of the flat spot shall not exceed the value given by the formula: D =√ (2tD).
d= largest dimension of the flat spot.
t= nominal wall thickness.
D= nominal pipe diameter.
Q54. What is a line schedule?
Ans. A line schedule gives the full details of P&ID Number, Line identification, Line routing, fluid service, phase, density, temperature( operating, design and test), pressure( operating, design and test), insulation type, painting systems, PWHT, Jacketing identification for the entire unit.
Q55. How we will represent a slope in P& ID?
Ans. A slope is represented by
(A ratio shall be given) ⌳
Q56. Why weep hole is provided in pad?
Ans. Reinforcing pad of welded branch connections shall be pneumatically leak tested with air at 1.75 bar through a minimum of one ¼” (6 mm) tapped vent hole / weep hole for venting and examined for leaks using a soap solution at a reduced pressure of 0.2 to 0.35 bar. The 6 mm tapped vent shall not be located in the crotch of the branch.
Q57. What 4 types of Inspection Action points are found in the ITP & Explain?
Ans. Hold, Witness, Surveillance, Review.
- Hold- QA/QC organization shall be notified of the timing of inspection or test in advance. Inspection or test shall not be carried out without the QA/QC organization representative in attendance.
- Witness- QA/QC organization shall be notified of the timing of Inspection or test in advance. However, the inspection or test shall be performed as scheduled if the QA/QC organization representative is not present.
- Surveillance- QA/QC organization to monitor work in progress without notice from Construction Organization.
- Review- Review and approval of documents.
Q58. What are jack-screws and when are they required?
- They are located at flanges connections to facilitate maintenance and removal of spectacle and orifice plates to facilitate maintenance.
- For orifice flanges, jack screws shall be installed at 3 and 9’ O Clock position.
Q59. What are piping joint limitations?
- Socket Welded pipe in hazardous services is 1½-inch maximum
- For sour service, socket-welded joints are not allowed.
- The axial gap between male and female components a maximum of 3 mm and minimum of 1.5 mm. This gap is obtained prior to welding
- In hazardous services, the maximum size of threaded connections is 1½-inch for standard fittings and valves
- In non-hazardous services, the maximum size of threaded connections is 3-inch for standard fittings and valves
- The minimum number of the engaged pipe threads per nominal size is as follows:
a) For 1/2" & 3/4", 6 threads must be engaged.
b) For 1" through 1-1/2", 7 threads must be engaged.
c) For 2" through 3", 8 threads must be engaged.
Q60. What are the general requirements for test manifold and fittings?
- Pressure testing manifolds were separately pressure tested to at least 1.2 times system test pressure. Pressure rating or design of test manifold components (isolation valves, pipe nipples, and fittings) exceeds system test pressure by 20%.
- A blow down valve of adequate pressure rating is installed to depressurize the system safely.
- Test piping, fittings and hoses are designed or have adequate pressure ratings that match or exceed system class/ test pressure.
- Paddles or spectacle blinds & other fabricated test items used to isolate test sections are at least the same code class rating of systems under test.
Q61. Define Pressure Test, Service Test
- Pressure Test- A test conducted to piping or equipment by subjecting it to an internal pressure using liquid or gas to ensure strength or tightness of the system at the test pressure.
- Service Test- A leak test conducted at operating pressure using the service fluid.
Q62. What is material receiving inspection?
- Match physical condition in field to service condition shown on Drawings/Hardware lists.
- Specification and marking/color-coding & Positive Material Identification (PMI).
- Identification of grade by ASTM Specification listed on Drawings/bolting list will give clear remits.
- Identification of fittings and flanges by correct ratings, sizes, class, schedules as marked on fittings & mill certificates.
- For the correct Scheduling of Pipe, by a Vernier Caliper and ensure piping is within tolerances.
⇒ All The Best ⇐




0 Comments
please do not enter any spam link in the comment box.